After 20 years of teaching at Brookfield Central, I am saying goodbye. Although I spent the majority of that time in the physics classroom alongside my learners. That changed for my last 18 weeks. I ended up in a place similar to where I started, teaching chemistry and biology. So, rather than dealing with juniors and seniors at the end of their high school careers, I was in classrooms with freshmen and sophomores still trying to find their place. At the same time, I was learning and teaching a set curriculum I hadn't taught in over a decade. So, we were learning. But, of course, I already knew the content. The point of this post is to take a step back, reflect, and share the gratitude from the last students I had in my 20 years at Brookfield Central High School, as expressed through the cards and notes they made for me on my last day with them. I don't take many "yay me" moments. But after 20 years, I'll soak this one in.


In modern PD, we spend a lot of time discussing the why of adopting new practices. But this week in IMMOOC, we are focusing on the how. Specifically, the prompt I’m focusing on is, “How do you create more opportunities to connect and provide effective feedback to support those you serve?” I’d like to focus this post on the #1 tool I use in class for feedback, Pear Deck.
Pear Deck is a great tool for students to interact with a presentation. It allows for collecting student thinking to drive instruction and creating opportunities for student reflection during instruction. Students can interact via any web enabled device from a laptop to a smartphone. It is a gigantic leap over clickers and tools like poll anywhere because of the interactions it allows learners to have and the forms of feedback that can be collected.
With the recent addition of the Pear Deck add-on for Google Slides, I think it’s a great time to share more information about, how it can be used. Pear Deck is a Freemium piece of software. While teachers can pay for a subscription and get a large number of additional features, I’d like to focus only on the free features that are available with the Pear Deck add-on.
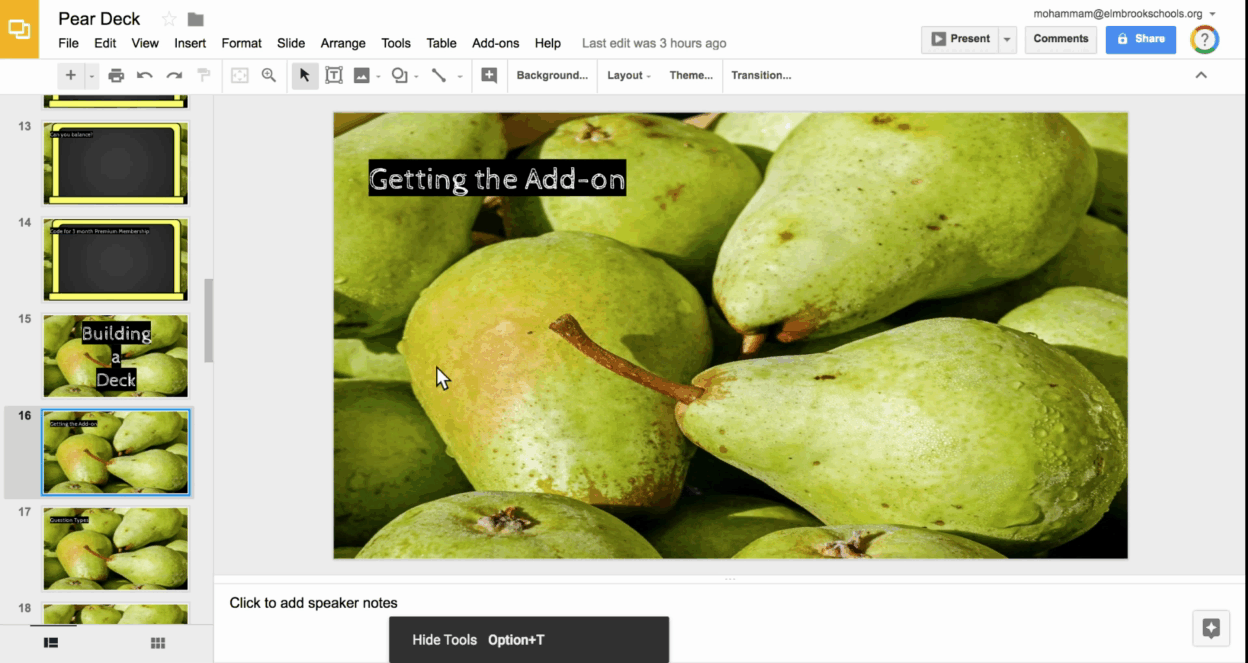
Getting add-on
The first thing to do is open Google Slides and go to Add-ons in the top toolbar.
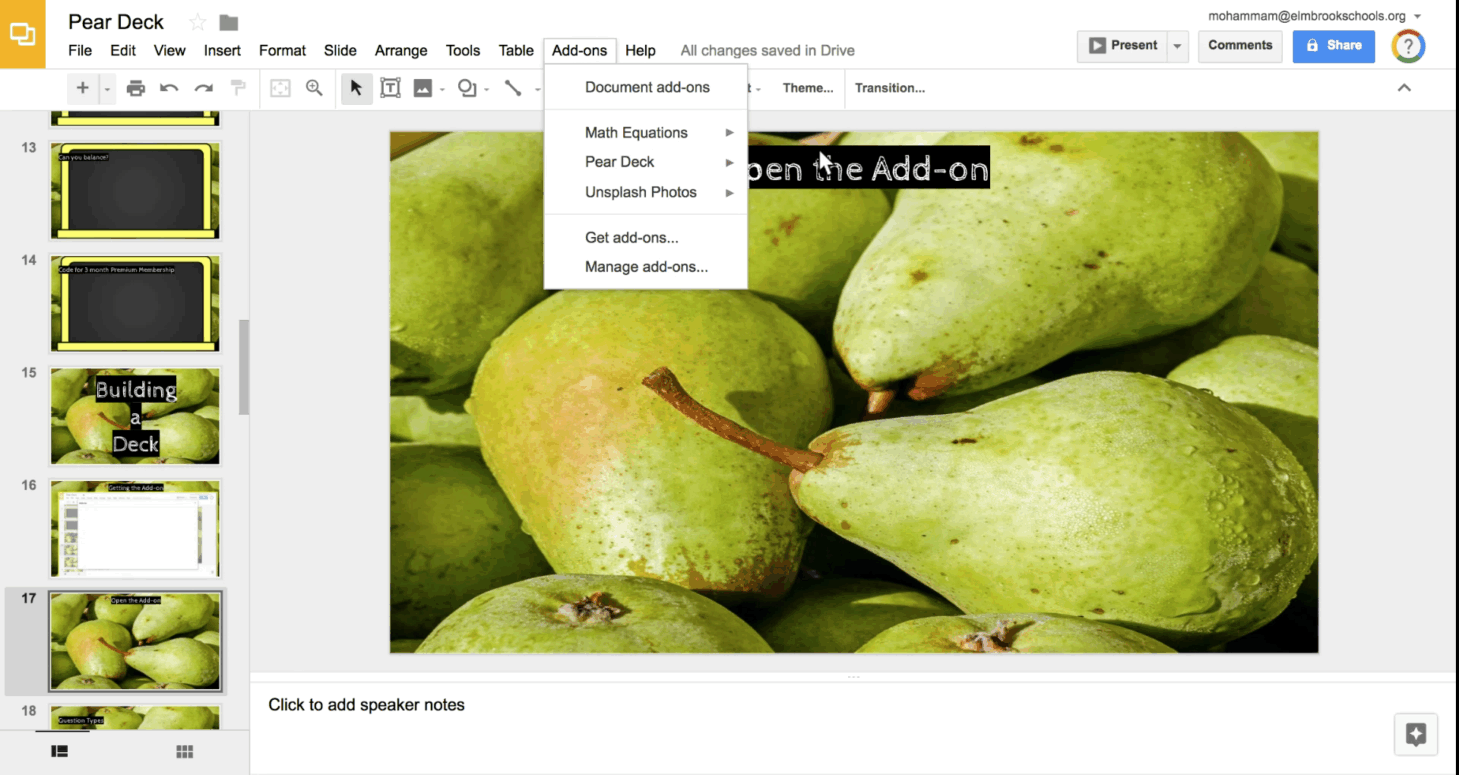
Opening the Sidebar
Once you’ve added the add-on, you can access it’s features by opening the add-on.
The sidebar is where all the functionality is for the add-on. From the sidebar you can
- Add student response slide templates from the gallery
- Turn the current slide into an interactive slide
- Present a Pear Deck to your class
Slide Templates
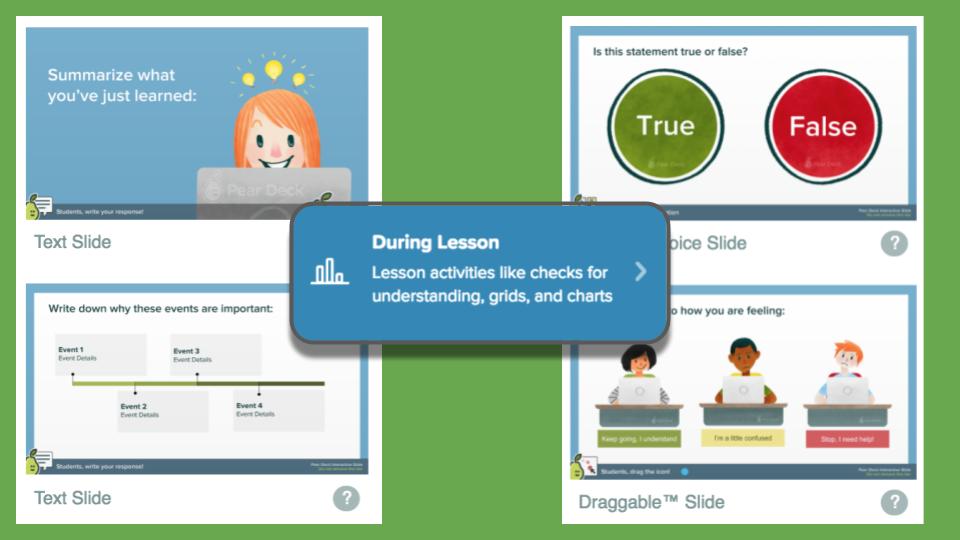
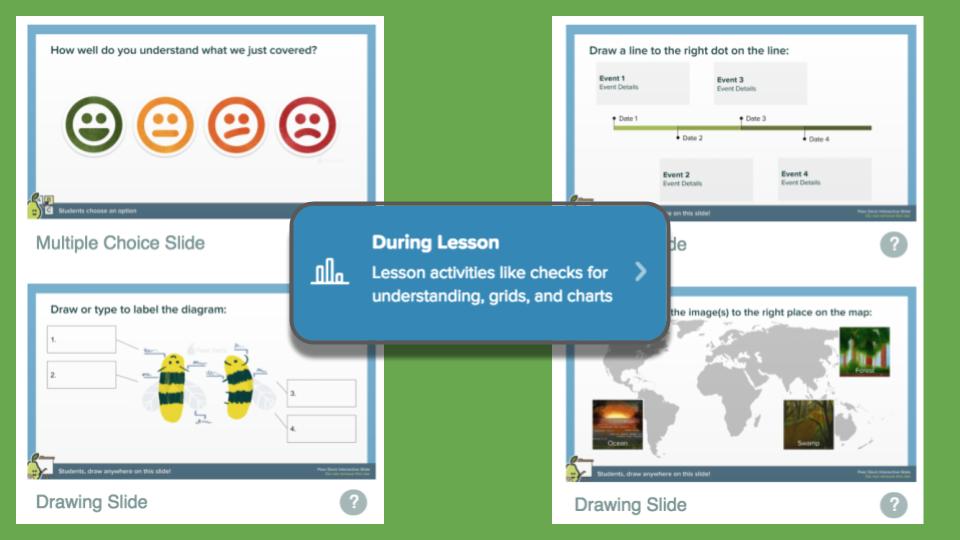
The add on provides a gallery of different pre-made interaction slides that are completely editable.

They are divided into 3 different categories
- Beginning of Lesson - Think of these as a way to tap into prior knowledge or build curiosity related to a topic before you begin digging deeper.

- During Lesson - These are great ways to check for understanding or provide opportunities for discussion where every student’s ideas can be heard during instruction.

- End of Lesson - Think of these as opportunities for students to reflect and summarize learning from the lesson and a way for teachers to get some feedback about the lesson.

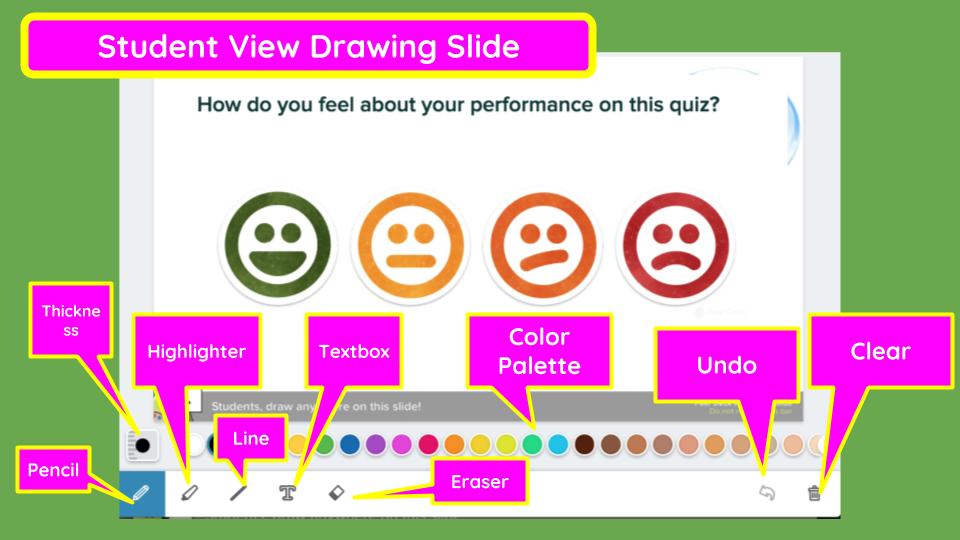
The templates provide for a wide variety of learner response modes beyond multiple choice. They include drawings, dragging a dot, text and numerical response.
So if you open a presentation you already have, you can just add these slides wherever you’d like to get students to interact with the presentation and their peers.
Adding Response to a Current Slide
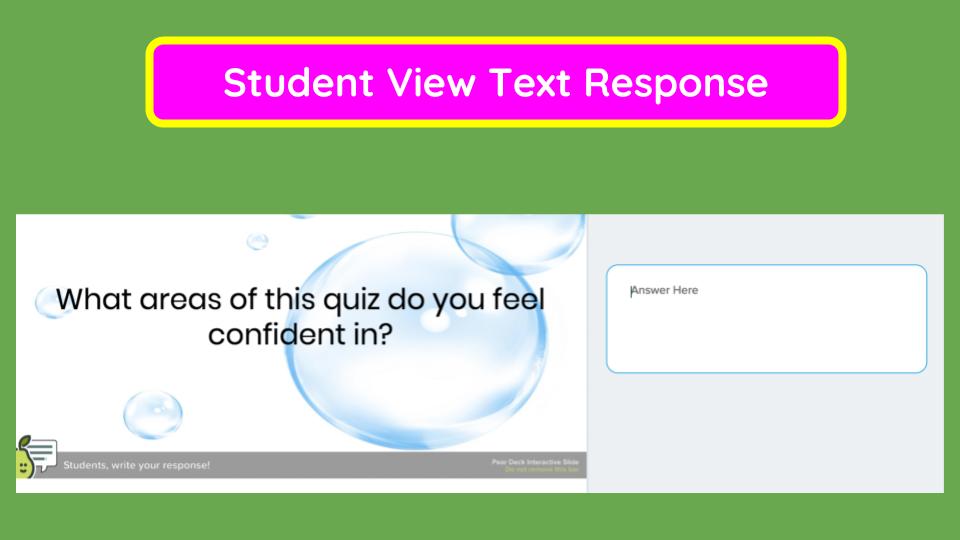
You don’t need to use the templates from Pear Deck to create interactions. You can create or use your own slides then add an interaction via the sidebar. You can make any slide a text response, numerical response, or a multiple choice. With the slide open, just click the option you would like from the sidebar and follow the pop-up instructions.
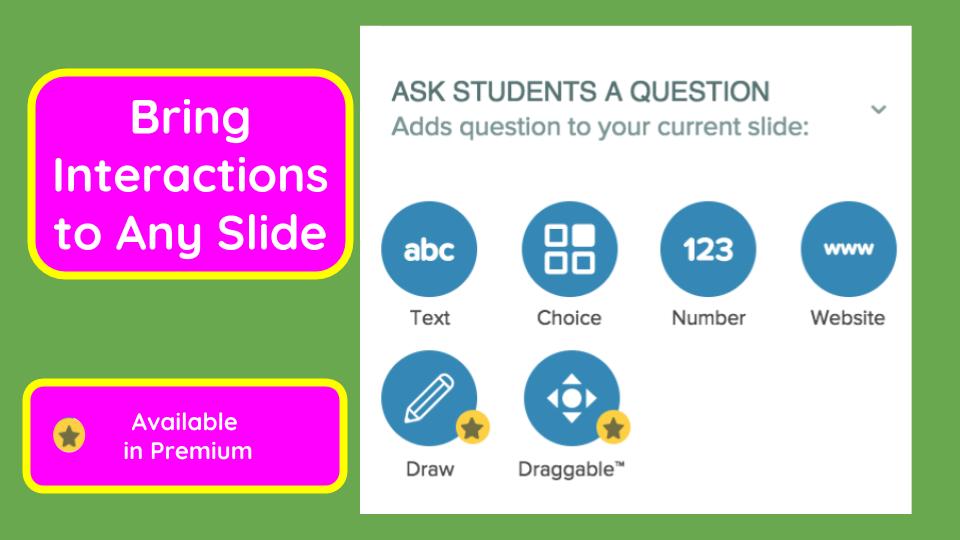
You can also add a web link that will direct student devices to that link while you project what is on your current slide. Perhaps, instructions may be displayed on the slide while students would be taken to an article to read or simulation to experiment with on the web.
The two question types not available to add-on to a slide you created are draw and Draggable (these are premium features). But remember, there is a gallery of these that can be used and altered with no requirement for a premium account.
Start Presenting
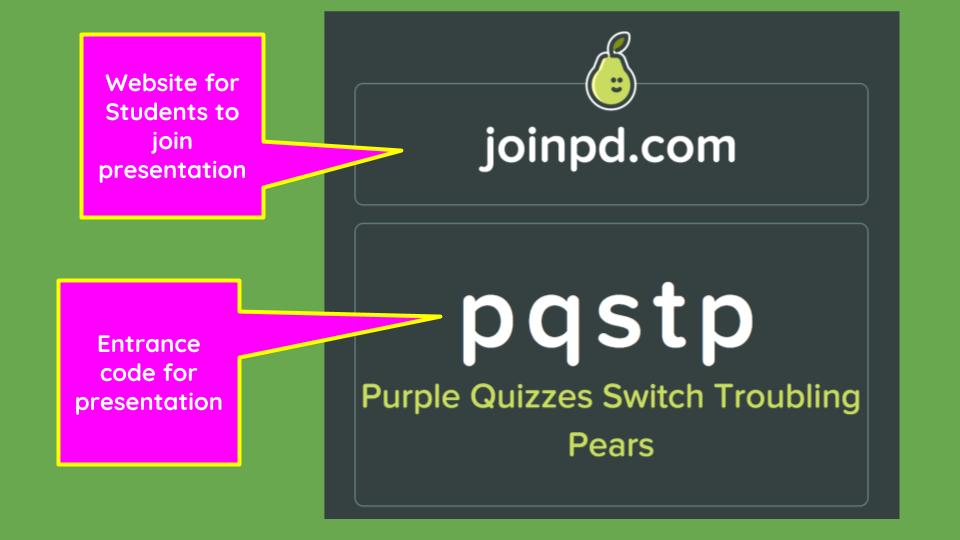
When you’ve got your presentation all ready, you can again use the sidebar to launch your presentation.

A code will appear on the projector that will direct students to join the presentation session.
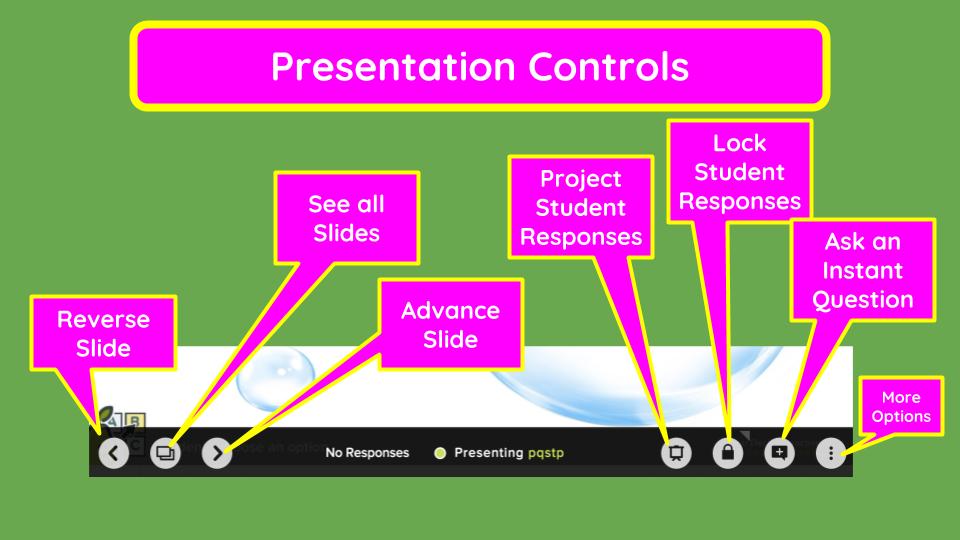
Presentation Controls
Once students have logged in, use the control bar at the bottom of the screen to navigate through your presentation.
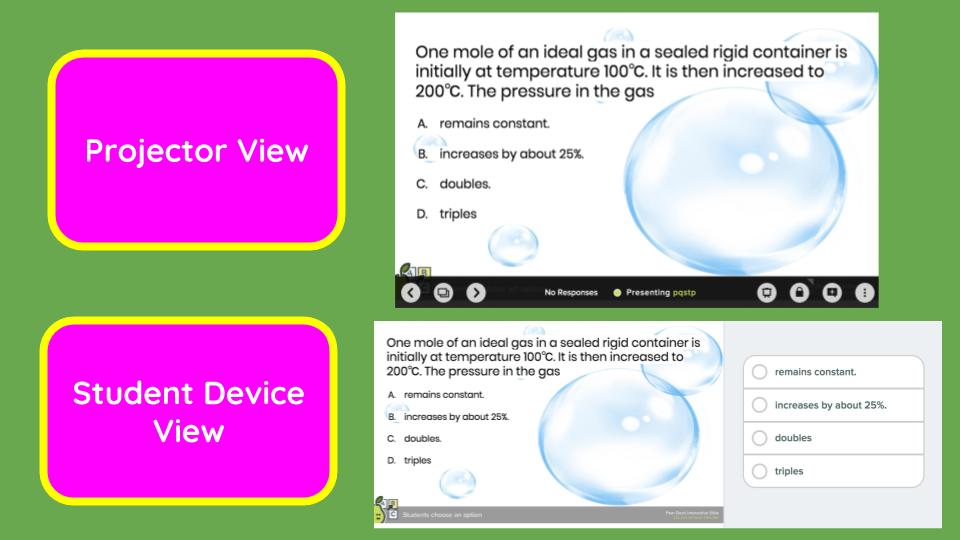
As you progress through slides, students will see the projected version on their device. When you reach a response slide, students will have space to respond aligned to the type of interaction.
Looking at Data in Real Time
So students are responding to a question, what next? By hitting the lock button, you can lock students from responding. The project button, shows student responses on the projector. No student names are ever projected. Responses can be toggled to see an overlay of the class as a whole or each response individually. This is a great way to see where you are as a class in order to guide next steps for instruction in real time.
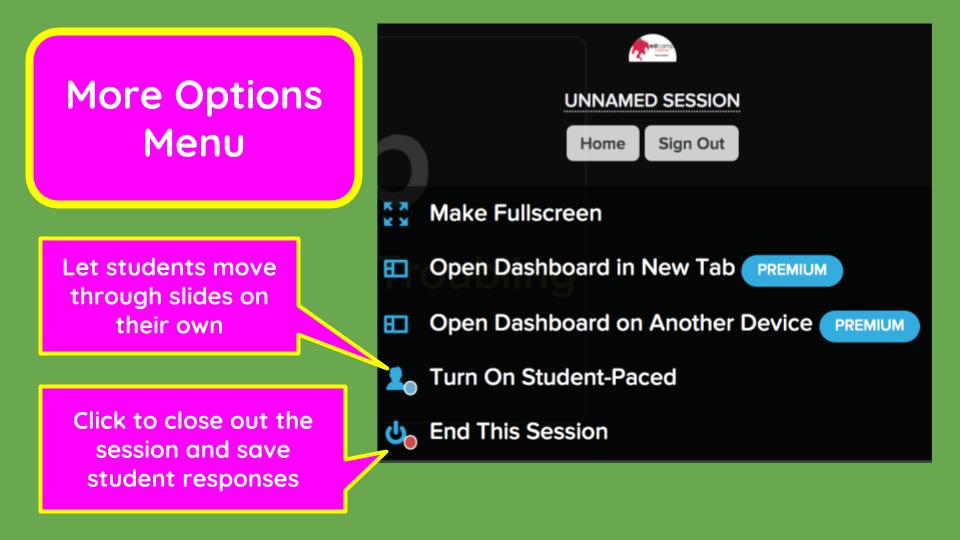
In addition, you can add questions on the fly with an instant question option. And the more option menu (the three dots in the bottom right hand corner) gives you the ability to let students work through a presentation at their own pace. I use this option for all of my practice quizzes. I give students a set amount of time to work through the slides and then we discuss/correct them together.
Looking at Data After the Fact
When your done with a presentation, hit the end session button under the more options menu.
To revisit the session and get more information, head to PearDeck.com and login. Here, you will find your most recently used decks. From this home page, you can reopen the session or export resposes to a spreadsheet.

Once you’ve closed a session, you can see how individual students responded to each question by exporting a Google Sheet. This will give you a chance to look more closely and quickly at who was struggling (or not engaged) and look at some of text responses in more depth. (I’ve blacked out names and emails.)

Feedback for Students and for Educators
Pear Deck is a great tool, but it is still a tool that must be put to work. The interactions you structure will help make it a useful tool. Understanding why your are using it and what you are asking learners for is the key to making it powerful. The interactions are a powerful tool to
- Check understanding during instruction
- Have students confer with peers
- Have students summarize learning
- Have students make hypothesis or state opinions before instruction
- Give students a chance to provide feedback on instruction
But in all cases, questions will be more useful when the teacher understands why the question is being asked and knowing what can be done with the results.
I’m a huge advocate for Pear Deck because of the positive feedback I get from my students about it. I use a bunch of different tech tools and strategies, but the use of Pear Deck is always the one thing students say helps them learn the best in my classroom.
If you have any Pear Deck questions, please reach out to me!!! (I'm a certified Pear Deck coach.)
Please note, I’ve only focused on the free version of Pear Deck. With a premium subscription, which includes the Teacher Dashboard, you can extend the efficiency and precision of the feedback you can provide. Here’s is little more info of how I use it.
Comments
Post a Comment