In my previous school district, I was the only teacher teaching a physics course with set, district-wide learning outcomes. These same outcomes were also taught in physics classrooms at the other high school in our district. But at our school, I was one of the 2 physics teachers. The other teacher taught the AP-level physics courses. So, in many ways, I had opportunities to incorporate strategies I believed were best for learners and that I found worked best for them without being seen as out of alignment with anyone in our building. My amazing friend and one of my teaching philosophy goddesses, Katie Novak, stated the following misconception about alignment: All teachers must deliver instruction in the exact same way. True alignment, she says, is about shared goals, rigor, and outcomes. Thank you, Katie! Katie has taught me to truly believe that learner variability is the rule, not the exception. I encourage you to take 10 minutes to listen to Katie Novak explain it in the ...

As Megan Peschke and I were closing out our collaboration between here kindergarten and my Physics students, I asked her what one thing she would like us to do. She said that she would love to love to have my students create books for her kids to read about physics. Immediately my mind went to Google Slides for digital book creation. It is something that I've heard advocated from many of my EdTech heroes like Kasey Bell, Matt Miller, and Eric Curts. Since we wouldn't be able to meet to read them in person, we decided to insert audio into Google Slides of the high school students reading the story. This insert audio idea is one that is not original and I for sure have heard Kasey, Matt, and Eric mention as a use of audio in slides. In this post, I'd like to walk through the creation process and share the works my students created.
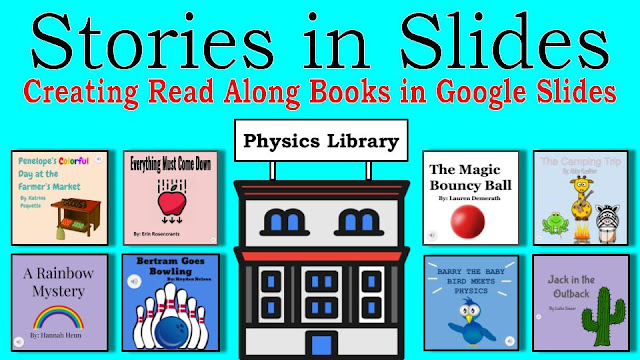
The goal of the project for my students was to create a short children’s book for Kindergartners applying a basic physics concept. Below, you'll find a slide library of some of the finished project. Click on any of the covers to access the book.
I broke the process into 5 steps to be completed over 6 days of virtual learning.
- Brainstorm story topic and physics concept
- Write text of story
- Add text to Google Slides storybook
- Add images to Google Slides storybook
- Record and add audio for Google Slides storybook
Brainstorm Story Topic and Physics Concept
The first day, I asked students to consider taking one of two paths in terms of brainstorming. They should either think of a topic we covered this year that they would like to make a story about. or think of a story they'd like to tell and figure out connections to physics. I made it very clear that I was available to help because it's very easy for me to relate anything to physics. It was important that they not dig too deep into the content as this was intended for a kindergarten audience and keep their story idea small as they would be limited to 100 words for their story. When thinking of their story idea, I told students to focus on 1) Who was their main character? 2) What event happens in the story? 3) Where would the story take place?
Write Text of Story
Before students got too far into trying to design a storybook for kids, I wanted them to be clear about what their story was. So, I had them type up the text in a Google Doc. I told them to construct their text in 2 parts 1) The story itself (70-100 words) 2) A science explanation (30 words max). I instructed them to keep sentences short, use vocabulary appropriate to the audience, and explain any big physics words so the audience could understand. For the science explanation, it was important that it related specifically to the events in the story
Add Text to Google Slides Storybook
I created a Google Slide template for each student to create their book. I adjusted the size of the slides to 8" x 8" to replicate the square shape of many kids books and make it look a little different than a normal slideshow. Students were welcome to create their own slide formatting, but I thought this would help many students get a good start.
I told students to change the background of the slides to make them visually interesting. I shared the video below for those who weren't sure how.
Then, I instructed students to break their text up over a course of a maximum of 10 slides. I encouraged them to use some novel yet readable fonts in their book. The video below contains instructions for adding fonts to Slides.
I also made a short video explaining how to add Word Art.
Add Images to Google Slides Storybook
I instructed students to have at least 1 image per page. I gave students the option to create their own images/drawings or search for appropriate ones within Google Slides. For those looking to create their own images, I encouraged the use of AutoDraw for turning rough touch pad shapes into nice illustrations. I hadn't actually tried AutoDraw until last week, but I think it is really nice for creating simple illustrations. I just need to figure out if you can make the background transparent when downloading. Here's a quick tutorial I made for students before I realized backgrounds weren't transparent.
The other option was to search for images in Google Slides. I made a few videos showing them how to search, group, and edit images.
Add images in Google Slides
Group Images to Make a Picture
Combining Images and Shapes in Google Slides
Record and Add Audio for Google Slides Storybook
The final step to creating the book was adding audio to each slide. I instructed students to use Cloud Audio Recorder because it is free and has a simple workflow for recording directly to Google Drive. The most important thing though is to have students create a folder to house the audio files that is shared so that anyone has the ability to view the files within. If the folder with audio doesn't have the right share settings, no one will be able to access the audio. I made a quick tutorial video for this process.
Once the folder is created, students can use Cloud Audio Recorder to make an audio file for each page of the storybook.
Once all the audio files are recorded, students can easily add them to each page using the INSERT -> AUDIO feature in Google Slides.
Once this is completed, students share their book using the Publish to the Web link. This will give the best experience for the reader. If you're not sure how to do this, check out the image below.

I've included the slideshow of the instructions I shared with students below. Here is a direct link if you'd like to make a copy and edit it for your own purposes.
Reflecting on the process and the final products, there are a few changes I'd like to make for the next time I do this. The first is taking more time to construct and review the stories themselves. Due to time constraints, this process was rushed. I asked students for their ideas, but didn't have time to truly make sure that the physics was appropriately explained. I'd like to have more time to be sure my students are using all terminology correctly and explaining it at an appropriate level for kindergartners. The other aspect I'd like to spend more time with is consistency in images across a single story. I'd like to have the time to workshop and conference with students around this idea. I had several students who still used images that were copyright protected, had a watermark, or a background that was jarring. This would definitely take more time. So, this would no longer simply be a week long project. It could still take the same number of days, but those days could be spread out across several weeks. This would allow time for me to provide feedback and have conferences with students.
If any other teacher in any discipline are doing similar projects, I'd love to hear how you are managing the work.
Comments
Post a Comment