In my previous school district, I was the only teacher teaching a physics course with set, district-wide learning outcomes. These same outcomes were also taught in physics classrooms at the other high school in our district. But at our school, I was one of the 2 physics teachers. The other teacher taught the AP-level physics courses. So, in many ways, I had opportunities to incorporate strategies I believed were best for learners and that I found worked best for them without being seen as out of alignment with anyone in our building. My amazing friend and one of my teaching philosophy goddesses, Katie Novak, stated the following misconception about alignment: All teachers must deliver instruction in the exact same way. True alignment, she says, is about shared goals, rigor, and outcomes. Thank you, Katie! Katie has taught me to truly believe that learner variability is the rule, not the exception. I encourage you to take 10 minutes to listen to Katie Novak explain it in the ...

Although the final day of the SLATE conference was a 1/2 day it was just as filled with educational wisdom and hacks.
As a teacher who is trying to have students create authentic public products, infographics are a great option. But never having created one myself or even analyzing the formats and flows of varied infographics, I am at a loss for where to begin. I know that they are a great device for conveying information, but how do I go from that to having my students actually create high quality infographics instead of something that is just a glorified poster of content information and disconnected pictures.
Danielle outlines 3 major parts of a infographic in her presentation:

Here are the steps she walks through with all of her students.

I look forward to going through this process with students who choose to use an infographic as a part of their sound project this term. In order to cover content as we critique, I hope to include infographics that center around the unit we will be starting next week: Light. It will be great to be able to share perhaps a quality infographic and a poor infographic as we transition from a class run critique to individual critiques.
Ok, at this point I feel like I'm just embedding Danielle's slides because she does such a thoughtful and thorough job of approaching the topic. But, this list of steps she runs though with her classes comes right from her gorgeous website.
Steps:
In terms of the applications for making infographics, Danielle created a continuum of simple to complex:
I am really looking forward to approaching infographics from an educated process standpoint. Danielle did a wonderful job in her presentation explaining the "Why, What, and How" of infographics.
The second morning session I attended was by Spanish teacher Alesia Behnke from Hudson High School. Her revolution is to go beyond traditional PowerPoint style slideshows and use more engaging tools for access to content and methods for students to express understanding. Right off the bat, we realized that Alesia's presentation was in a completely different format. She was using a tool called Symbaloo which presents links to web resources in a tile format. Probably my favorite tool that she presented on that I hope to bring to my classroom is Thinglink. First, here is the link to here presentation. What I've created below is a Thinglink highlighting some of my favorite tools she demonstrated.
A Thinglink is an image which has specific tags to text, images, or links. So scroll around and look for the tags to get more info.
Link to the Thinglink image
I look forward to trying Thinglink in my classroom with activities such as creating interactive force diagrams where students show work for calculating quantities or explaining thinking. I think there are some great possibilities. Even for explaining lab apparatus after taking a picture or explaining the parts of a graph. Ok, I just got more excited to try this out for realz.
Dr. Rankin framed an effective classroom as a complex ecosystem. When we think of an ecosystem there are specific elements at play. Those elements in a successful ecosystem are:


But to elaborate on what these 3 categories mean in the classroom, we need to expand on them so we are clear in the working definition of each.

So there we have it a successful ecosystem.
Community, Context, and Content tie directly into Success Skills also known as 21st Century Skills. Below, you can see how they are framed in different modes and aspects of learning.


Infographics - Visual Communication is a Powerful Tool
When I was looking at which sessions I would be attending today, I was immediately drawn to infographics because they are a wonderful tool for allowing students to demonstrate content mastery by creating a non-traditional text. Then, I saw Danielle Brannan's presentation and knew that's what I was doing first thing. The presentation is filled to 11 with information and resources. If you have time to walk through it, do now! Otherwise save it for later. I'll highlight some of the takeaways for my high school classroom.
As a teacher who is trying to have students create authentic public products, infographics are a great option. But never having created one myself or even analyzing the formats and flows of varied infographics, I am at a loss for where to begin. I know that they are a great device for conveying information, but how do I go from that to having my students actually create high quality infographics instead of something that is just a glorified poster of content information and disconnected pictures.
Danielle outlines 3 major parts of a infographic in her presentation:

Here are the steps she walks through with all of her students.

I look forward to going through this process with students who choose to use an infographic as a part of their sound project this term. In order to cover content as we critique, I hope to include infographics that center around the unit we will be starting next week: Light. It will be great to be able to share perhaps a quality infographic and a poor infographic as we transition from a class run critique to individual critiques.
Ok, at this point I feel like I'm just embedding Danielle's slides because she does such a thoughtful and thorough job of approaching the topic. But, this list of steps she runs though with her classes comes right from her gorgeous website.
Steps:
In terms of the applications for making infographics, Danielle created a continuum of simple to complex:
- Novice: Glogster
- Intermediate: Canva
- Advanced: Easel.ly
- Master: Piktochart
I am really looking forward to approaching infographics from an educated process standpoint. Danielle did a wonderful job in her presentation explaining the "Why, What, and How" of infographics.
No More power points- Go Interactive
A Thinglink is an image which has specific tags to text, images, or links. So scroll around and look for the tags to get more info.
Link to the Thinglink image
I look forward to trying Thinglink in my classroom with activities such as creating interactive force diagrams where students show work for calculating quantities or explaining thinking. I think there are some great possibilities. Even for explaining lab apparatus after taking a picture or explaining the parts of a graph. Ok, I just got more excited to try this out for realz.
Tech Tool Teachmeet
I was unable to attend this session which was facilitated by Jason Bretzmann. A teachmeet is a place "to share good practice, practical innovations and personal insights in teaching with technology." Essentially participants briefly shared out a tool that was useful to them. It was apparently a fast paced and super engaging session. All the participants I talked to wanted to try this at their home schools as a part of regular PD. Ultimately what was created for those all to share was a google doc full of resources. Check it out below. I'm saving this one for Christmas morning.
New Dimensions in Learning: Unleashing Creativity Through Content, Context, and Community
The closing keynote of the conference was given by Dr. William Rankin who is Director of Learning on the education team at Apple. don't have access to a copy Dr. Rankin's Keynote digitally. So, I'll be referring to pictures taken with my phone. There were a couple of slides that I don't have images of. Hopefully, access will be granted over the next couple of days an I'll be able to update.

Look back on these elements and frame them in terms of the classroom experience. Can't we say that they are also essential elements of a successful learning environment?
Dr. Rankin went on to group these 6 elements into 3 categories.

But to elaborate on what these 3 categories mean in the classroom, we need to expand on them so we are clear in the working definition of each.

So there we have it a successful ecosystem.
Community, Context, and Content tie directly into Success Skills also known as 21st Century Skills. Below, you can see how they are framed in different modes and aspects of learning.

So looking at the framing here we now have 3 student modes: Curate/Know, Create/Act, and Collaborate/Value. So in our classrooms, it's not enough to know and act, students need to value their learning by framing it in a meaningful context but also within the larger community not just their own mind.

William went on to finish with reference to Apple's design goals:
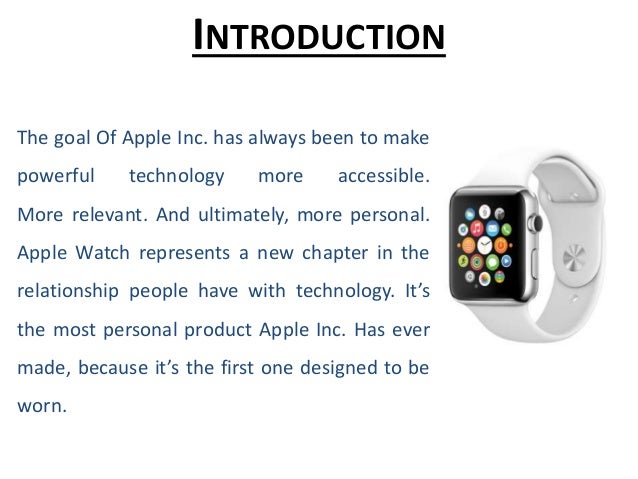
Those 3 goals apply directly to what the design goals of education should be.
- Accessible
- Relevant
- Personal
William finished with the idea that if you are going to teach something you need to make it relevant on day 1. His example was a cooking class. You don't spend the entire class learning about equipment.

This should apply to any classroom. Students need to learn the content by doing rather than being taught the content.
My first trip to SLATE was fantastic. I already have a couple of ideas for what I want to submit proposals for next year. If I'm lucky I'll be back next year.
Comments
Post a Comment